Page 3
Quality Resource Guide –
Porcelain Veneers 3rd Edition
www.metdental.com
veneer. Placing a thin film of a bonding resin after
the silane has been applied and dried significantly
improves the bond strength of new resin to old
composite.
26,27
Bonding to existing composite resins compared to
tooth structure causes no significant microleakage
or fracture load differences.
28
In a clinical trail of
of 3.5 years, porcelain veneers bonded to existing
composites of good quality untreated and treated
with silane and Cojet (a silica coating) showed no
significant difference in outcomes.
29
Design to Prevent Chipping & Fractures
How do you minimize chipping and fractures
of porcelain veneers? All veneers depend on
adequate support to minimize chipping. Bonding
to tooth structure provides some of the support.
Making sure there is no more than 2mm of free-
standing porcelain will also minimize fractures,
especially for diastema closures. There should
be adequate anterior guidance in protrusive and
lateral movements in order to prevent excessive
stresses on the veneers. Group function may place
too much stress on veneers and can increase the
incidence of chipping. Inadequate bonding can also
cause chipping of the porcelain.
6
Make sure each
bonding step is followed carefully and without error
or contamination. Fracture can also occur if the
preparation design includes sharp angles rather
than rounded angles. Research is quite conclusive
in demonstrating the concentration of forces in
areas of the preparation that are sharp.
6,7,8
Interproximal Extension
Where should the interproximal margins end?
Some clinicians will favor not breaking the contact
with the adjacent anterior tooth, thereby placing
interproximal margins slightly labial to - or right
at the proximal contact.
6
Margins placed labial to
the proximal contact may reveal stain over time.
Proximal margins are extended lingually when
closing diastemas; including old restorations that
extend lingually past the proximal line angle; and
when a tooth is being repositioned by veneering
to alter either the inciso-apical tilt, the incisal edge
placement, or the mesio-distal alignment of the
facial and proximal surfaces. In all cases, clinicians
are urged to prepare the tooth especially near the
gingival margin interproximally, so that the original
tooth structure does not show. (Figure 12; note the
areas at the arrows)
Veneer preparations should have a chamfered
margin gingivally and interproximally.
10,11
This
permits sufficient thickness for the veneer to mask
underlying discoloration. A well-defined finish line
permits accurate positioning and smooth marginal
finishing of the veneers. Unless discoloration would
cause a need to do otherwise, the gingival margin
should be placed at the crest of the gingival margin
of tissue. The most favorable response from the
gingiva is achieved with the margins at the crest of
the gingival tissue.
10,11
If dark discoloration must be
covered, then the margin design may extend about
0.5-1.0 mm subgingival. This will assure a favorable
periodontal response.
For many years after porcelain veneers were first
introduced, it was recommended that all veneer
margins end on enamel, because dentin bonding
at the time was not predictable.
10,11
With dramatic
improvements in dentin bonding over the past
twenty years, there is greater acceptance of
preparation designs that place margins in dentin
or cementum. However, the clinician should realize
that, over time, some margins ending on dentin or
cementum will leak and could affect the longevity
of the restoration, even when the best materials
and techniques are used. The greater the percent of
the preparation is on dentin, the greater the risk for
fracture.
11,12,13,14,15,16
Incisal Design
Suggestions for the design of the incisal margin of
the tooth preparation has varied over time, but today
there is general consensus that preparation of the
incisal margin for porcelain veneers is required, but
it should permit no more than 2mm of free-standing
porcelain. It is generally agreed that extending
porcelain more than 2mm beyond the incisal edge
of the tooth significantly increases the likelihood of
fracture.
Suggestions for the design of the linguo-
incisal margin has varied over time but the best
incisal design identified by research is a 1-2mm
incisal reduction with a butt joint (i,e, no lingual
chamfer). This design will minimize incisal chipping,
and will make the fitting, bonding and fabrication
of the porcelain veneer easier.
17
Newer research is
beginning to support the idea of two designs to the
incisal. For worn and chipped incisal enamel, a butt
joint is recommended; whereas for healthy normal
teeth an incisal overlap, i.e. a palatal chamfer is
preferred.
18,19,20,21
The butt joint design handles
stress better in worn teeth and concentrates stress
less in unworn teeth and have proven over a 7-year
clinical trail to be reliable.
In a situation where a significant portion of the
incisal length or incisal angle is missing, it is
recommended to build the incisal angle up using
composite resin prior to covering the restored
defect with a porcelain veneer. Research has shown
that replacing missing tooth structure with a bonded
composite will improve the outcome in terms of
fracture resistance; as compared to not building up
the fractured tooth and ending up with too great a
thickness of porcelain.
22,23
Other studies show that
bonding to previously placed composites affect
the bond strength and can increase incidence of
chipping, or fracture.
19, 20
The theory underlining this
finding relates to the water sorption of composite
resins and its effect on free monomer. This water
sorption will reduce the availability of free monomer
to which resins subsequently bond. Generally, the
older the composite, the weaker is the bond to
it. The best practice is to replace any composite
material contained within the porcelain veneer
preparation outline, if the existing composite age
is greater than about 2-3 years. Repair strength
studies show bond strengths after that time begin to
fall below 50% of the tensile strength of the material
being studied.
24,25
Research also directs us to apply
silane to any pre-existing composite material under
a porcelain veneer before luting the porcelain
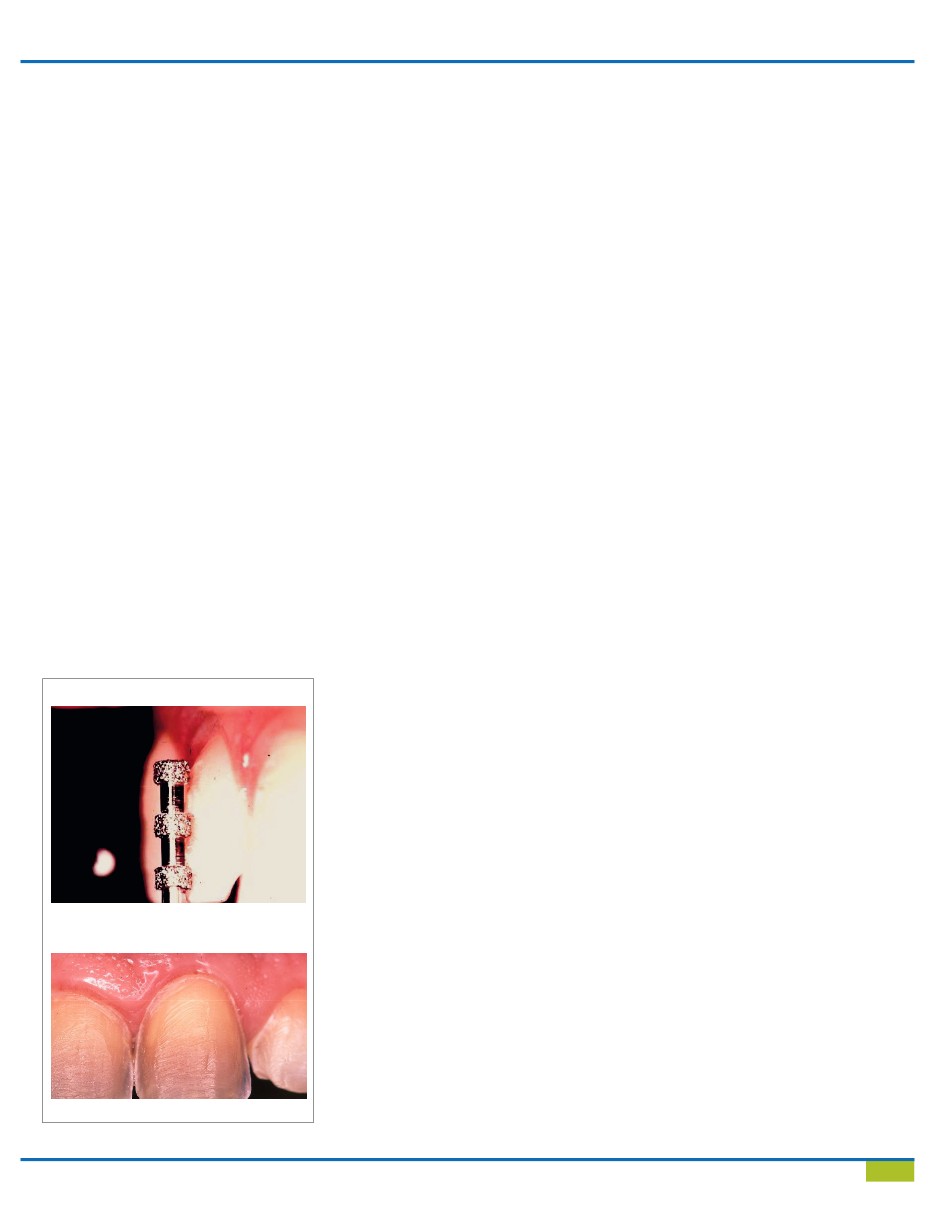
Figure 10
Metered tooth reduction
Figure 11
Completed porcelain veneer preparation